TECHNOLOGY
Step-by-Step Tutorial: How to Use EmbedTree.com for Your Website

In the ever-evolving digital landscape, integrating engaging content into your website can make all the difference. Enter EmbedTree.com your go-to solution for seamlessly embedding various media types to enhance user experience and boost engagement. Whether you’re a blogger looking to share videos or an e-commerce site wanting to showcase customer reviews, EmbedTree.com offers the tools you need.
This step-by-step tutorial will guide you through using embedtree.com, making it easy to elevate your site’s interactivity without any coding skills needed. Let’s dive in and unlock new possibilities for your web content!
Benefits of Using EmbedTree.com for Your Website
EmbedTree.com offers a seamless way to enhance your website’s content. By integrating various media types, you create a richer user experience that keeps visitors engaged.
EmbedTree.com accommodates different formats effortlessly. This flexibility can make your site more visually appealing and informative.
Moreover, using EmbedTree.com can improve loading times. Since the heavy lifting happens on their servers, your own site’s performance remains robust and swift.
Another advantage is ease of use. You don’t need advanced coding skills to implement embeds effectively. This accessibility allows anyone to enrich their website without technical barriers.
Embedding content from popular platforms can boost your SEO efforts by increasing dwell time and reducing bounce rates. The result? A stronger online presence that attracts more visitors organically.
Step 1: Creating an Account
Getting started with EmbedTree is simple. The first step involves creating your account, which opens the door to a world of embedding possibilities.
Visit embedtree.com and click on the “Sign Up” button. You’ll need to provide some basic information like your email address and a password. Make sure to choose a secure password that’s easy for you to remember but hard for others to guess.
Once you fill out the required fields, check your inbox for a confirmation email. Clicking on that link will activate your account instantly.
For an even smoother experience, consider signing up using social media accounts if they offer that option. This can save time and streamline future logins.
With just these few steps, you’re ready to dive into customizing content widgets that will enhance your website’s engagement levels significantly!
Step 2: Choosing the Type of Content to Embed
Once you’ve created your EmbedTree account, it’s time to decide what type of content you want to embed. The platform offers a variety of options tailored to different needs.
Consider the audience you’re targeting. Are they looking for videos, images, or perhaps interactive maps? Tailoring your choice can significantly enhance user engagement.
Next, think about the message you want to convey through your embedded content. A well-chosen video might tell a story more effectively than text alone.
Don’t forget about format compatibility. Ensure that the selected type aligns seamlessly with your website’s design and functionality. This attention to detail will keep everything cohesive and professional.
Experimenting is encouraged! Try different types of content before settling on one that resonates best with both you and your visitors.
Step 3: Customizing the Embed Widget
Customizing the embed widget is where your creativity shines. Once you’ve selected your content, it’s time to make it uniquely yours.
Start by exploring the various design options available on EmbedTree. You can adjust colors, fonts, and sizes to match your brand aesthetic seamlessly.
Don’t overlook functionality either. Decide how you want users to interact with the embedded content—will they be able to share or like? These features enhance user engagement.
Previewing changes in real-time allows you to see how everything aligns before finalizing it. Tweak any elements that don’t feel quite right until the widget embodies your vision perfectly.
With these customization tools at your disposal, transforming a standard embed into an engaging component of your website becomes effortless. Embrace these adjustments; they play a vital role in creating an inviting experience for visitors.
Step 4: Generating and Copying the Embed Code
Once you’ve customized your embed widget to your liking, it’s time to generate the embed code. This is a crucial step in making sure everything looks just right on your site.
Click on the “Generate Code” button. In seconds, EmbedTree will create a unique HTML snippet tailored for your content.
You’ll see the code appear in a designated box. It’s usually highlighted automatically for easy access. Take a moment to review it; make sure all settings reflect what you want.
Now, copy this code by clicking the copy icon or using keyboard shortcuts like Ctrl+C (Cmd+C for Mac users).
With this simple action, you’ve got everything you need to bring that engaging content directly onto your website!
Step 5: Pasting the Embed Code onto Your Website
Once you’ve generated the embed code from EmbedTree, it’s time to bring that content to life on your website.
Begin by navigating to the page or post where you want the embed to appear. If you’re using a popular CMS like WordPress, switch to the HTML or text editor.
Locate the spot in your content where you’d like the widget displayed. This could be right after an introduction or nestled within a blog post for added engagement.
Simply paste the copied embed code directly into this area. After pasting, switch back to visual mode if applicable, and you’ll see it seamlessly integrated into your layout.
Don’t forget to save changes and preview your page before publishing! This step ensures everything looks just as you envisioned it before it goes live for visitors.
Troubleshooting Common Issues with EmbedTree.com
When using EmbedTree, you may encounter a few common issues. One of the most frequent is problems with the embed code not displaying correctly on your website. This often happens if there’s a conflict with existing scripts or styles.
If your content doesn’t show up as expected, double-check that you’ve copied all parts of the embed code accurately. Even a small omission can lead to display issues.
Another typical problem involves responsiveness; sometimes, embeds may not adjust well on mobile devices. Ensure you select responsive settings when customizing your widget to avoid this issue.
Load times might also be affected by heavy content embedded from external sources. Always test performance after adding any new elements and optimize as necessary.
If you’re experiencing persistent errors, refer to EmbedTree’s support documentation for guidance or reach out to their customer service for assistance tailored to your specific situation.
Tips for Maximizing the Use
To get the most out of EmbedTree, consider integrating multiple content types. This creates a dynamic experience for your visitors.
Utilize analytics tools to track how users interact with your embedded content. Understanding engagement metrics can help you refine what works best.
Regularly update your embeds to keep the content fresh and relevant. Stale information can drive away returning visitors.
Experiment with different placements on your website. Test various sections like sidebars, footers, or within articles to see where they perform best.
Encourage user interaction by adding calls-to-action alongside your embeds. Prompting viewers can boost engagement rates significantly.
Don’t hesitate to ask for feedback from users about their experience. Their insights can guide improvements and inspire future updates.
Conclusion
Using EmbedTree can transform how you integrate content into your website. By following the straightforward steps outlined, you can enhance user engagement and improve the overall aesthetic of your site. Whether you’re looking to embed videos, social media feeds, or other dynamic content, EmbedTree provides a versatile solution.
With its easy-to-navigate interface and customizable options, anyone—regardless of technical skill—can successfully implement it on their website. Remember to troubleshoot any issues that may arise along the way and take advantage of tips for maximizing your use of this powerful tool.
As you continue exploring what embedtree.com has to offer, consider how these integrations can elevate your web presence. The potential benefits are immense; all it takes is a few simple steps to get started on enhancing your digital experience. Happy embedding!

The best Magic Hour AI image editor in 2025 combines fast editing, automation, and advanced tools like Magic Hour face swap and Magic Hour lip sync all in one seamless workflow.
As of June 2025, AI image editing has moved far beyond simple filters. Today, users expect tools that can automatically remove backgrounds, enhance resolution, generate visuals, and even swap faces in a video.
The real challenge is choosing a platform that balances speed, quality, and creative control. This guide breaks down the most effective tools available, focusing on real-world performance and practical use cases.
Best Face Swap Online Tools in a Quick Glance
| Tool | Best For | Modalities | Platforms | Free Plan | Key Strength |
| Magic Hour AI Image Editor | All-in-one editing + face swap | Image, Video | Web | Yes | Fast workflows + creative tools |
| Adobe Firefly | Professional design workflows | Image, | Web, Adobe apps | Yes | Industry-grade integration |
| Canva AI | Social media and marketing visuals | Image, Graphics | Web+ Mobile | Yes | Ease of use |
| Runway ML | Advanced creative editing | Image+ video | Web | Limited | Experimental features |
| Fotor AI | Quick edits & enhancements | Image | Web+ Mobile | Yes | Beginner-friendly |
Magic Hour AI Image Editor
One reason Magic Hour leads this list is its ability to combine speed, simplicity, and powerful tools into one clean interface. It stands out as a top Magic Hour AI image editor for both beginners and creators.
It goes beyond basic editing. You can generate images, enhance quality, remove objects, perform Magic Hour face swap, and even swap faces in a video all in one workflow. It also supports Magic Hour lip sync, allowing you to animate faces realistically in video content.
Pros:
- Fast processing with minimal delay
- Built-in Magic Hour face swap with natural output
- Supports image and video editing
- Includes Magic Hour lip sync for animated content
- Easy-to-use interface
- Strong automation for repetitive tasks
Cons:
- Advanced controls are limited compared to Pro Tools
- Requires an internet connection
- Some features are locked behind paid plans
Evaluation
I tested Magic Hour across portrait editing, content creation, and video workflows. What stood out most was how quickly it handled complex edits. The Magic Hour face swap feature is highly reliable, and the ability to swap faces in a video with consistent quality makes it even more valuable.
If you want an all-in-one tool that saves time while delivering strong results, this is hard to beat.
Pricing:
- Free plan available
- Premium plans with extended credits and features
Adobe Firefly
Adobe Firefly is built for creators already working within the Adobe ecosystem. It integrates smoothly with tools like Photoshop.
Pros:
- High-quality image generation
- Seamless Adobe integration
- Strong text-to-image capabilities
- Reliable for commercial use
Cons:
- Learning curve for beginners
- Requires an Adobe subscription
- Slower workflow compared to lightweight tools
Evaluation
Firefly works best in professional environments where precision matters. However, it feels heavier compared to faster tools like Magic Hour.
Pricing:
- Free credits available
- Included in Adobe Creative Cloud plans
Canva AI
Canva AI focuses on speed and simplicity, making it ideal for marketers and small businesses.
Pros:
- Very easy to use
- Drag-and-drop interface
- Great for social media visuals
- Large template library
Cons:
- Limited advanced editing features
- Less control over fine details
- Outputs can feel generic
Evaluation
Canva is perfect for quick, polished visuals. However, it lacks advanced features like Magic Hour face swap or the ability to swap faces effectively in a video.
Pricing:
- Free plan available
- Pro plan with additional features
Runway ML
Runway ML is designed for creators who want to experiment with advanced AI tools.
Pros:
- Advanced AI capabilities
- Supports image and video editing
- Constantly evolving features
- Ideal for creative projects
Cons:
- Interface can feel complex
- Not beginner-friendly
- Performance varies
Evaluation
Runway ML offers powerful tools for creative experimentation. It’s less predictable but strong for pushing creative limits.
Pricing:
- Limited free plan
- Paid tiers for full access
Fotor AI
Fotor AI focuses on simplicity and quick edits.
Pros:
- Beginner-friendly interface
- One-click enhancements
- Affordable pricing
- Mobile support
Cons:
- Limited advanced features
- Basic AI capabilities
- Not suitable for complex edits
Evaluation
Fotor is reliable for basic editing tasks. It’s a good option for users who want fast results without complexity.
Pricing:
- Free plan available
- Low-cost premium plans
How I Chose These Tools
I tested each platform based on real-world usage scenarios:
- Portrait editing
- Background removal
- Image enhancement
- Creative generation
- Face swap performance
- Ability to swap faces in a video
- Lip sync accuracy using tools like Magic Hour lip sync
Key criteria:
- Output Quality: Realism and clarity
- Speed: Time required to complete edits
- Ease of Use: How quickly users can get results
I also evaluated automation features, since speed plays a major role in modern workflows.
Magic Hour consistently delivered the best balance between speed, quality, and ease of use.
Market Landscape & Trends
AI image editing continues to evolve quickly.
Key trends in 2025:
- All-in-One Platforms Are Leading
Users prefer tools that combine editing, generation, and animation. Magic Hour reflects this shift. - Face Swap Is Now Standard
Features like Magic Hour face swap and the ability to swap faces in a video are becoming essential. - Lip Sync and Animation Are Growing
Tools that offer Magic Hour lip sync are gaining traction in video content creation. - Speed Is Critical
Fast processing is now expected, not optional. - Image + Video Integration
More platforms are blending image editing with video workflows. - Automation Is Driving Adoption
One-click edits reduce the barrier for new users.
According to industry insights from Adobe and Gartner, AI-driven creative tools are seeing rapid adoption across industries.
Final Takeaway
The best Magic Hour AI image editor combines speed, simplicity, and creative flexibility on a single platform.
Quick breakdown:
- Best overall: Magic Hour AI Image Editor
- Best for professionals: Adobe Firefly
- Best for beginners: Canva AI
- Best for experimentation: Runway ML
- Best for quick edits: Fotor AI
If features like Magic Hour face swap, Magic Hour lip sync, and the ability to swap faces in a video are important to you, Magic Hour is the clear choice.
The smartest approach is simple: test a few tools and build a workflow that saves you time.
FAQ’s
Does Magic Hour support face swapping?
Yes, Magic Hour face swap is one of its strongest features, delivering realistic and fast results.
Can I swap faces in a video using AI tools?
Yes, tools like Magic Hour allow you to swap faces in a video with consistent quality and smooth transitions.
What is Magic Hour lip sync?
It’s a feature that syncs facial movements with audio, making animated videos look realistic.
Are AI image editors free?
Most tools offer free plans with limited credits. Paid plans unlock more features.
Which tool is best for beginners?
Canva AI and Fotor AI are the easiest to start with.
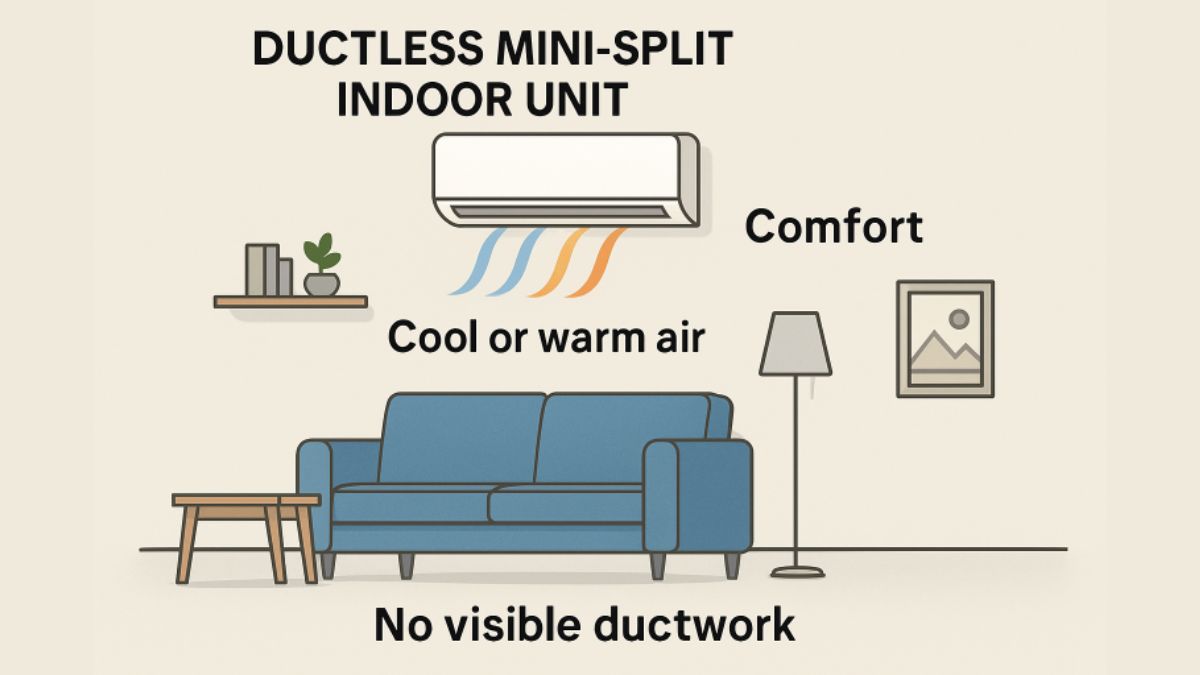
Homeowners are increasingly exploring innovative solutions for residential climate control, and ductless mini split systems have quickly emerged as a preferred choice. They are celebrated for their streamlined design, efficiency, and ability to deliver targeted comfort in any room. For residents seeking improved climate control, particularly in areas with older homes or new additions, ductless air conditioners Staten Island are an excellent option. The combination of energy savings, modern convenience, and flexible installation has made these systems a popular upgrade for those seeking a more comfortable living environment.
Ductless mini splits bypass the inefficiencies and limitations of traditional HVAC with ease. By removing the need for bulky ductwork, these systems provide a practical solution for many modern living spaces, including apartments, finished basements, and converted garages. The adoption of ductless systems has gained momentum as homeowners discover their potential to lower utility bills, improve air quality, and offer individualized comfort.
Energy Efficiency and Cost Savings
Ductless mini split systems are engineered to maximize energy efficiency. Unlike conventional HVAC units, which often lose up to 30 percent of their energy output through ductwork leaks and inefficiencies, ductless systems deliver conditioned air directly to specific zones. This technology, particularly when equipped with inverter-driven compressors, can operate at variable speeds to precisely match the cooling or heating load required. The result is reduced energy waste and consistent savings on monthly utility bills. According to the U.S. Department of Energy, ductless mini-splits can save homeowners substantial costs over time, making them an eco-friendly and economically smart choice.
Easy Installation and Flexibility
The ease of installation is a major advantage of ductless mini-split systems. They require only a small hole in the wall to run the necessary conduit between the indoor and outdoor units. This means homeowners do not have to worry about invasive construction or the expense of installing new ductwork, which can be especially costly in homes that were not originally designed for central air. This flexibility makes ductless systems ideal for historic homes, home additions, and spaces where traditional HVAC systems are impractical. With minimal disruption and fast setup, many installations can be completed in less than a day.
Enhanced Indoor Air Quality
Indoor air quality is a significant concern for many households, particularly those with allergies or respiratory conditions. Traditional ducted systems can harbor dust, allergens, and mold, which are circulated throughout the house. Ductless mini split systems, however, often feature multi-stage filtration that helps reduce the presence of particulate matter, bacteria, and unpleasant odors inside the home. Without ducts that accumulate dust over time, these systems provide a cleaner, healthier indoor environment. Health-conscious homeowners find this a valuable feature, especially as awareness of indoor air quality continues to grow.
Quiet Operation
Comfort is not just about temperature but also about maintaining a peaceful environment. One of the most appealing features of ductless mini-splits is their quiet operation. Unlike the noisy fans and blowers found in many central air systems, mini splits utilize advanced technology to minimize operational noise. The indoor units are designed to operate at a sound level often lower than a whisper, making them ideal for bedrooms, nurseries, home offices, and living rooms. This allows family members to enjoy their activities or sleep without the disruptive hum of a conventional air system.
Smart Technology Integration
Modern ductless mini split systems offer features that align with the demands of today’s connected homes. Many units now integrate with home automation platforms, allowing users to control their systems remotely via smartphone apps or voice commands. This smart technology not only offers convenience but also helps homeowners monitor and manage their energy consumption more effectively. Real-time adjustments and scheduling features further support energy savings, enabling users to set their desired comfort levels when and where needed.
Zoning Capabilities
Zoning is a standout feature that distinguishes ductless mini split systems from traditional HVAC units. Each indoor air handler can be set to a different temperature, allowing personalized comfort for different rooms or users. This approach not only enhances individual comfort preferences but also drives further energy savings. Instead of heating or cooling empty spaces, homeowners can direct climate control only to occupied rooms. Families with varying needs—be it a cooler bedroom or a warmer living room—can each benefit from this focused climate control and ultimately reduce overall energy consumption.
Environmental Impact
Concern for the environment is another compelling reason to adopt ductless mini split systems. These systems reduce energy use and carbon emissions by operating more efficiently and enabling tailored climate control. Many models use modern refrigerants that have a lower impact on global warming compared to older options. Choosing ductless systems can help households shrink their environmental footprint by contributing to sustainability initiatives. Broad adoption of these technologies aligns with global climate action goals and encourages responsible resource use. More details can be found at EPA Greening EPA.
Conclusion
Ductless mini split systems are truly changing the way homeowners approach residential comfort. Their advantages—from simple installation and energy efficiency to enhanced air quality, quiet operation, and smart technology integration—make them a compelling upgrade for many homes. With the added benefits of zoning and environmental responsibility, ductless mini-splits are poised to remain a leading solution for those seeking a modern, efficient, and healthy living environment.
Introduction
In modern lighting design, versatility, durability, and visual appeal are essential. The Waterproof RGB LED Strip has become a popular choice for both residential and commercial projects because it combines energy efficiency with vibrant, customizable lighting effects. However, the performance of these LED strips depends heavily on a reliable Waterproof Power Supply.
Whether you are designing outdoor landscapes, architectural facades, or poolside installations, pairing your RGB LED strips with a high-quality waterproof power supply ensures long-term reliability, safety, and optimal performance. In this article, we explore the key applications, benefits, and best practices for using waterproof RGB LED strips powered by durable waterproof power supplies.
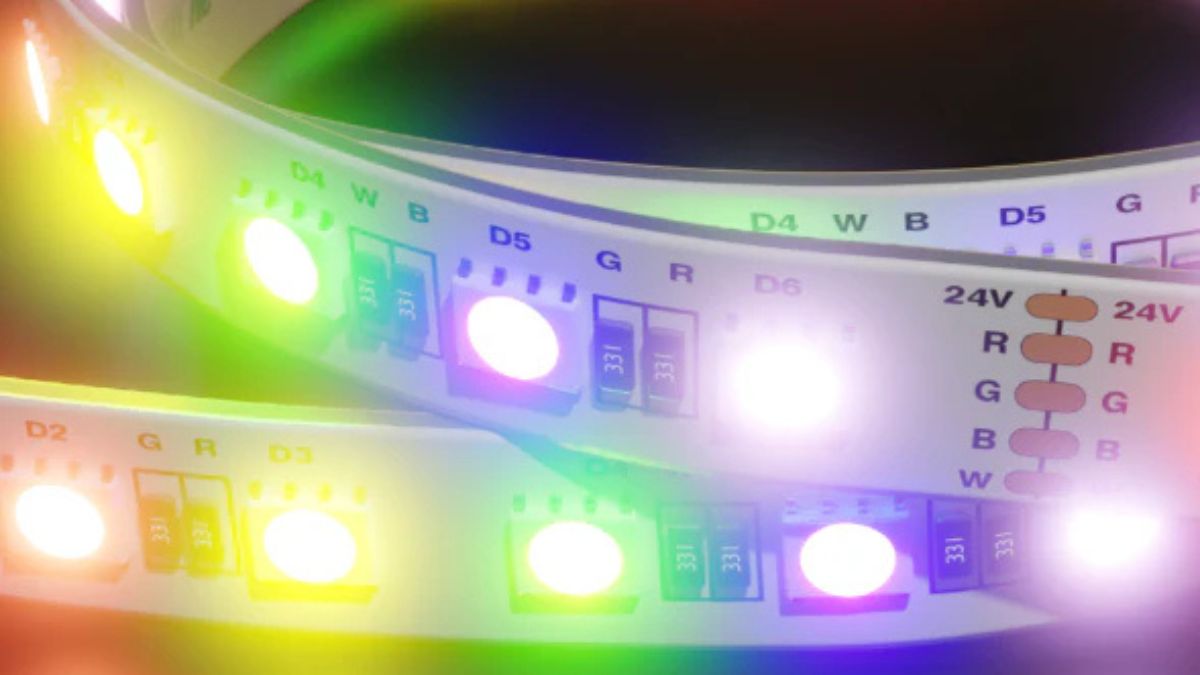
What Is a Waterproof RGB LED Strip?
A Waterproof RGB LED Strip is a flexible strip of LEDs that can emit red, green, and blue light in various combinations to create millions of colors. Its waterproof design allows it to operate safely in damp or wet environments, making it ideal for outdoor or moisture-prone applications.
These LED strips are often coated with silicone or encased in a protective tube, preventing water damage while maintaining flexibility and brightness. When paired with a reliable Waterproof Power Supply, they deliver consistent performance without flickering, overheating, or short-circuiting.
Key Applications of Waterproof RGB LED Strips
Outdoor and Landscape Lighting
Waterproof RGB LED strips are perfect for illuminating gardens, pathways, patios, and fountains. Their flexible design allows for easy installation along curves and edges, while waterproof power supplies ensure safe operation even in rainy or humid conditions. The ability to change colors and set dynamic lighting modes enhances aesthetic appeal and creates vibrant outdoor environments.
Architectural and Façade Lighting
Architects and designers use waterproof RGB LED strips to accentuate building features, highlight columns, or add dynamic effects to facades. With a dependable waterproof power supply , these installations maintain consistent brightness and color accuracy, regardless of weather conditions.
Pools, Spas, and Water Features
Installing RGB LED strips around pools or inside water features requires a waterproof solution. The combination of a Waterproof RGB LED Strip with a durable waterproof power supply ensures safety and longevity while creating stunning visual effects for evening or night-time settings.
Commercial and Event Lighting
Waterproof RGB LED strips are widely used in restaurants, clubs, stage setups, and event venues. Dynamic color-changing effects enhance ambiance and customer experience. A waterproof power supply guarantees uninterrupted operation, even in high-humidity environments, reducing the risk of damage or failure.
Benefits of Using Waterproof RGB LED Strips with Waterproof Power Supplies
Enhanced Durability and Safety
Waterproof designs protect the LED strips and power supply from moisture, dust, and environmental damage. This reduces the risk of electrical failures, short circuits, and overheating, ensuring safe long-term operation.
Energy Efficiency and Cost Savings
LED technology consumes significantly less energy than traditional lighting. Combined with a high-quality waterproof power supply, these systems offer long-term savings on electricity while minimizing maintenance costs.
Customizable Lighting Effects
RGB LED strips provide millions of color options and programmable effects. When paired with a reliable power supply, they can maintain consistent color output and brightness, enhancing decorative, architectural, or entertainment lighting applications.
Versatility Across Applications
From outdoor landscapes to indoor commercial spaces, waterproof RGB LED strips powered by durable power supplies are highly adaptable. They can be cut to specific lengths, installed along curves, and synchronized with smart controllers for dynamic effects.
Why a Waterproof Power Supply Is Essential
The power supply is the backbone of any LED system. Using a high-quality Waterproof Power Supply ensures that your RGB LED strips receive stable voltage and current, preventing flickering, color inconsistency, or premature failure. In outdoor or wet environments, waterproof power supplies also protect against moisture and environmental hazards, extending the lifespan of your lighting installation.
Investing in a trusted waterproof power supply is critical for long-term reliability, especially for large-scale installations or environments exposed to water, humidity, or extreme temperatures.
Conclusion
Waterproof RGB LED Strips powered by durable Waterproof Power Supplies provide unmatched versatility, safety, and performance for both indoor and outdoor lighting applications. From architectural accents and landscapes to pools, commercial venues, and event lighting, this combination ensures vibrant colors, long-term reliability, and energy efficiency.
Choosing high-quality components and pairing them correctly guarantees not only a visually stunning result but also reduced maintenance costs and enhanced system longevity. By investing in a durable waterproof power supply and premium RGB LED strips, you can create captivating lighting environments that withstand the elements and deliver exceptional performance for years to come.
-

 FASHION2 years ago
Elegant Winter Party Style: Trendy Long-Sleeve Dresses and Essential Hair Care Tips
-

 FASHION1 year ago
Top Kids Clothing Trends for 2025 – What’s In Style This Year?
-

 HOME1 year ago
Weather Related Event Closings Explained
-

 TRAVEL1 year ago
Travel Tips for Visiting Korpenpelloz: What You Need to Know
-

 HOME1 year ago
Exploring the World of TG Tube: A Comprehensive Guide
-

 AUTOMOTIVE1 year ago
Mitsubishi Pajero 3.0 V6 – Specs, Performance & Guide
-

 EDUCATION1 year ago
Can You Wear a Different Coloured Contact Lens in Each Eye? The Science Behind Mismatched Vision
-

 BUSINESS2 years ago
HOW TO SHOP GOODWILL OUTLET STORE